
The planning stages of this build started about five or six years ago, but four years ago while going through a divorce I decided it was time to stop waiting and to pursue my dream. Couldn't think of a good name for this build, but since I'm turning 42 this year Project Midlife Crisis seems fitting :sonicjay: Its going to be used for all types off wheeling but with a focus on rock crawling.
I had a couple goals in mind with this build when I started...1) Learn a lot. This is my first buggy build. I knew I had a lot to learn and it may not work perfect when I'm done but I didn't want that to stop me. Only one way to learn and that's by doing things and making mistakes. 2) Budget...I'm a single Dad with two young kids so have to keep cost as low as possible. 3) Jeep based powertrain. Why? Well Jeeps are what I know, they are what I love, and being that my time and money were limited I decided to not pursue the LS route. 4) Design/fabricate as much of this build as I can. I am a mechanical design engineer with access to fabrication equipment and I love metal fabrication. So I knew I'd enjoy building this just as much as driving when I'm done.
So four year ago I picked up donor 199? XJ, some DOM tubing, and got started. I spent some time rough modeling the build in CAD before cutting any steel. I'm only working out of my two car garage at home and I don't have easy access to a bender so I designed the chassis with as few bends as possible. Also tried to make the design simple enough for me to assemble. I tacked together the base cradle on a layout table at work but everything else I've done at home. I've had to make a few adjustments to my original design but I have to say I'm pretty happy with how well its gone so far. I have a lot of work left to do (and money to spend :sonicjay") but figured it was time to start a build thread. I've got questions on a few things that might get answered and it might help keep me motivated to finish this thing some day. I only get a few hours a week to work on this project so over the last four years I've been chipping away at it when I my schedule and cash flow allow.
but figured it was time to start a build thread. I've got questions on a few things that might get answered and it might help keep me motivated to finish this thing some day. I only get a few hours a week to work on this project so over the last four years I've been chipping away at it when I my schedule and cash flow allow.
Build Specs/Plans:
Chassis:
2 seater (might see if I can fit a small bench seat in back for my kids)
113" wheelbase
21" belly
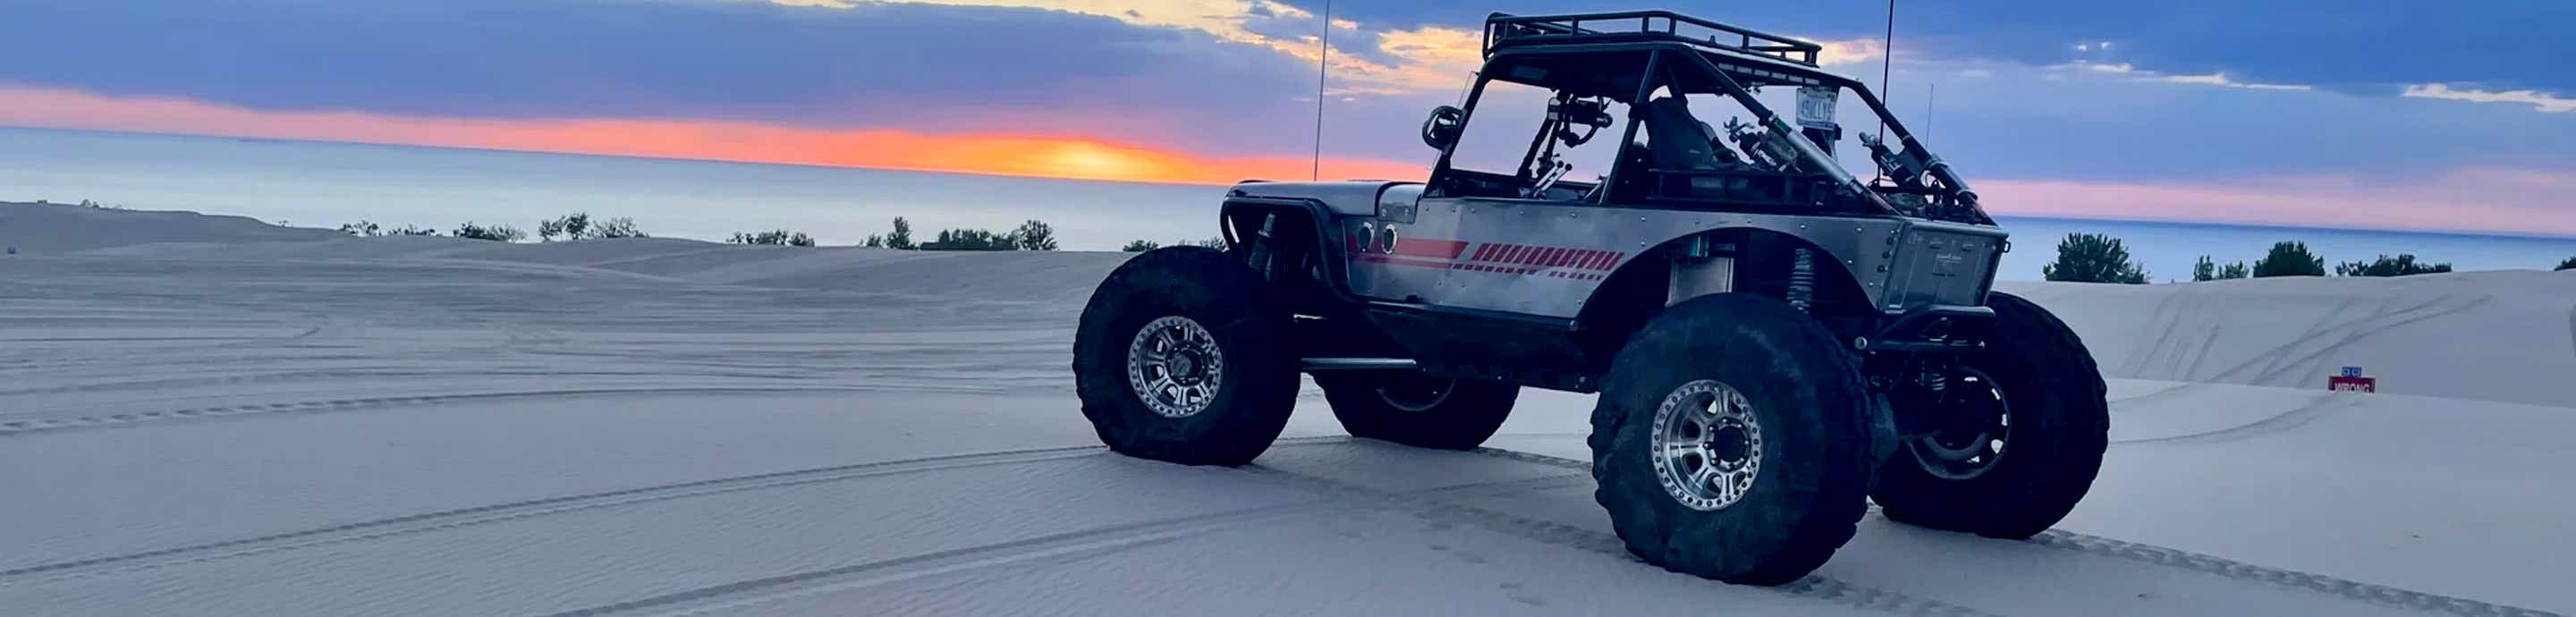
Main chassis is 1.75"x0.120 DOM, frame rails are 2"x4"x3/16" wall rectangular tubing, sliders are 1-7/8"x1/4" wall DOM
Powertrain:
Jeep 4.0...I was told its had some internal work and computer upgrades but have no way to confirm that. I was able to drive the donor Jeep before gutting it and it did seem to have more power than a stock 4.0.
AW4 with RAD manual shifter
Flipped D300 with 4:1
Front Axle:
Ford BJ Dana HP60 housing (not sure the exact year, 92-99 range I believe) w/ 4.10 gears (for now)
Barnes4x4 HD diff cover
Full hydro steering
My own truss and link mounts
Couple unknowns at this time. One, which locker I'm going to use. Second, what D60 outers I'm going to use. More on that below.
Rear Axle:
14 bolt w/ 4.10 gears (for now)
Probably a Detroit locker
Barnes4x4 pinion guard with the truss tie in, disk brake brackets, and HD diff cover
My own truss and link mounts
Suspension:
Double triangulated 4-link front and rear
Lowers are going to be 7075 aluminum and uppers are going to be 1.75x0.120 wall DOM
1-1/4" heims all the way around
Current plan is 16" travel coilovers on all four corners with 5" up travel, and 10" of droop (11" of droop might cause issues, we'll see)
Tires/Wheels:
Chassis and suspension are set up to run 40"x13.50" tires, not sure which ones yet.
Interior:
Corbeau suspension seats with 5pt harness
Basic gauges
???
I had a couple goals in mind with this build when I started...1) Learn a lot. This is my first buggy build. I knew I had a lot to learn and it may not work perfect when I'm done but I didn't want that to stop me. Only one way to learn and that's by doing things and making mistakes. 2) Budget...I'm a single Dad with two young kids so have to keep cost as low as possible. 3) Jeep based powertrain. Why? Well Jeeps are what I know, they are what I love, and being that my time and money were limited I decided to not pursue the LS route. 4) Design/fabricate as much of this build as I can. I am a mechanical design engineer with access to fabrication equipment and I love metal fabrication. So I knew I'd enjoy building this just as much as driving when I'm done.
So four year ago I picked up donor 199? XJ, some DOM tubing, and got started. I spent some time rough modeling the build in CAD before cutting any steel. I'm only working out of my two car garage at home and I don't have easy access to a bender so I designed the chassis with as few bends as possible. Also tried to make the design simple enough for me to assemble. I tacked together the base cradle on a layout table at work but everything else I've done at home. I've had to make a few adjustments to my original design but I have to say I'm pretty happy with how well its gone so far. I have a lot of work left to do (and money to spend :sonicjay
but figured it was time to start a build thread. I've got questions on a few things that might get answered and it might help keep me motivated to finish this thing some day. I only get a few hours a week to work on this project so over the last four years I've been chipping away at it when I my schedule and cash flow allow.Build Specs/Plans:
Chassis:
2 seater (might see if I can fit a small bench seat in back for my kids)
113" wheelbase
21" belly
Main chassis is 1.75"x0.120 DOM, frame rails are 2"x4"x3/16" wall rectangular tubing, sliders are 1-7/8"x1/4" wall DOM
Powertrain:
Jeep 4.0...I was told its had some internal work and computer upgrades but have no way to confirm that. I was able to drive the donor Jeep before gutting it and it did seem to have more power than a stock 4.0.
AW4 with RAD manual shifter
Flipped D300 with 4:1
Front Axle:
Ford BJ Dana HP60 housing (not sure the exact year, 92-99 range I believe) w/ 4.10 gears (for now)
Barnes4x4 HD diff cover
Full hydro steering
My own truss and link mounts
Couple unknowns at this time. One, which locker I'm going to use. Second, what D60 outers I'm going to use. More on that below.
Rear Axle:
14 bolt w/ 4.10 gears (for now)
Probably a Detroit locker
Barnes4x4 pinion guard with the truss tie in, disk brake brackets, and HD diff cover
My own truss and link mounts
Suspension:
Double triangulated 4-link front and rear
Lowers are going to be 7075 aluminum and uppers are going to be 1.75x0.120 wall DOM
1-1/4" heims all the way around
Current plan is 16" travel coilovers on all four corners with 5" up travel, and 10" of droop (11" of droop might cause issues, we'll see)
Tires/Wheels:
Chassis and suspension are set up to run 40"x13.50" tires, not sure which ones yet.
Interior:
Corbeau suspension seats with 5pt harness
Basic gauges
???


