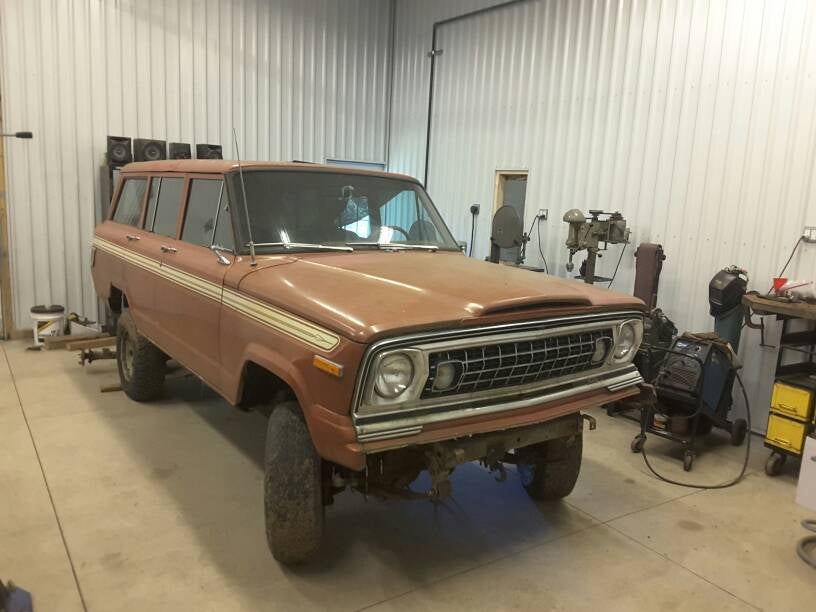
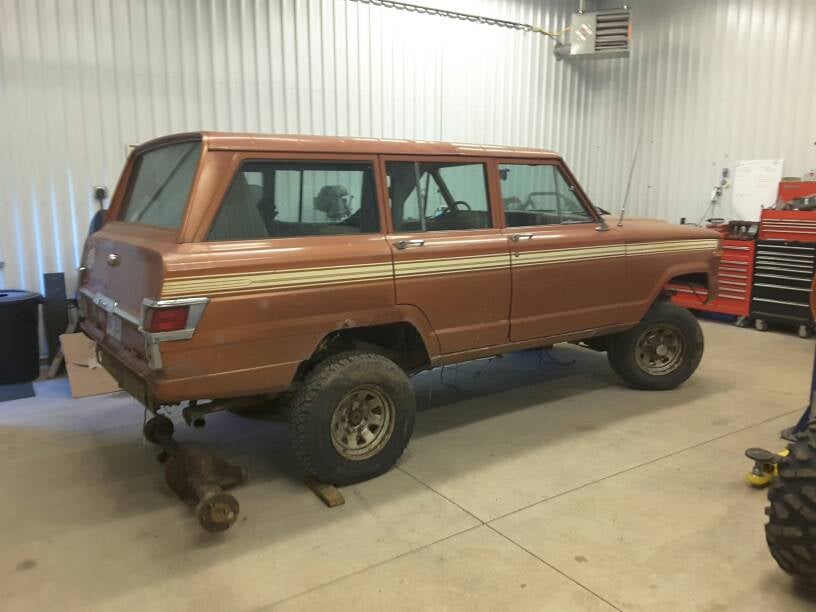
At post 110 I changed my mind and decided I would build a buggy instead of the Wag. The Wag continues to wait for it's next build.
At post 187 I ordered up a GoatBuilt JHF chassis to hopefully speed this up. (edit: nope)
Current Build plan:
GoatBuilt JHF Chassis, 108" wheelbase, "jeep" hood and grille
2007 Ford F250 Dana 60, 5.38, Sparty locker, JHF high-steer
- narrowed 4" to use 78 F250 axleshaft on the long side, using factory 1550 shafts
1998 Chevy K3500 14-bolt, shaved, 5.38, Detroit, 1/2t chevy disc brakes
39" BFG Krawler Red labels on KMC Machete Beadlocks
2001 GMC Yukon XL 6.0L LQ4
Atlas transfer case, 3.0 low range
Fox 2.5 air shocks
PSC Full Hydro, 2.5x10" ram, TC-pump
Mastercraft cheap seats with Impact 5-point harnesses
Griffin 31x19 radiator, Derale 16927 shroud and twin fans
Goatbuilt fuel tank and factory fuel pump
Magnaflow muffler mpe-12649
![Image]()
==================
I bought my Wagoneer in 1997. It was my first 4x4 and I bought it so that me and my friends could go camping and have room for our gear since we all drove econoboxes. That fall I ended up moving to Germany for 18 months and it went into storage.
When I got back I rebuilt the AMC 360 with the help of a friend, and we did enough maintenance on the rest to get it on the road. Over the next few years it got a 4" lift and went from 31s and then 35s when I put a 3" body lift. We did some wheeling with it and eventually I put it on 33 Stampers from my old Wrangler.
In around 2005 it was parked due to lack of time and using any spare time on my Wrangler. A few years later we stole the drive train for the TREC Wagoneer, and it has sat since.
Over the summer I got out of racing, bought a RZR and drug this back in the shop. I'm thinking I want to get it back on the road and trails.
![Image]()
![Image]()
Sent from my SM-T710 using Tapatalk
At post 187 I ordered up a GoatBuilt JHF chassis to hopefully speed this up. (edit: nope)
Current Build plan:
GoatBuilt JHF Chassis, 108" wheelbase, "jeep" hood and grille
2007 Ford F250 Dana 60, 5.38, Sparty locker, JHF high-steer
- narrowed 4" to use 78 F250 axleshaft on the long side, using factory 1550 shafts
1998 Chevy K3500 14-bolt, shaved, 5.38, Detroit, 1/2t chevy disc brakes
39" BFG Krawler Red labels on KMC Machete Beadlocks
2001 GMC Yukon XL 6.0L LQ4
- Holley TerminatorX EFI
- Champ oil pan (high-ish clearance, baffled, steel)
- Dorman LS2 car intake and Warr cable throttle body
- Holley fuel rails with late-model 6.0 truck injectors (EV6, E85 flow rates, 12613412)
- Goatbuilt accessory brackets, TC pump on driver's side, alt on passenger
- GM 706 heads
- BTR Truck Norris cam
Atlas transfer case, 3.0 low range
Fox 2.5 air shocks
PSC Full Hydro, 2.5x10" ram, TC-pump
Mastercraft cheap seats with Impact 5-point harnesses
Griffin 31x19 radiator, Derale 16927 shroud and twin fans
Goatbuilt fuel tank and factory fuel pump
Magnaflow muffler mpe-12649

==================
I bought my Wagoneer in 1997. It was my first 4x4 and I bought it so that me and my friends could go camping and have room for our gear since we all drove econoboxes. That fall I ended up moving to Germany for 18 months and it went into storage.
When I got back I rebuilt the AMC 360 with the help of a friend, and we did enough maintenance on the rest to get it on the road. Over the next few years it got a 4" lift and went from 31s and then 35s when I put a 3" body lift. We did some wheeling with it and eventually I put it on 33 Stampers from my old Wrangler.
In around 2005 it was parked due to lack of time and using any spare time on my Wrangler. A few years later we stole the drive train for the TREC Wagoneer, and it has sat since.
Over the summer I got out of racing, bought a RZR and drug this back in the shop. I'm thinking I want to get it back on the road and trails.


Sent from my SM-T710 using Tapatalk


